
Making your Yawl go quicker by Tim Petitt DY186
This was last published in the 2008 & 2014 newsletters. I have lost the original 2008 version, so have re-typed it for 2016 with some extra bits;
1. There is actually very little difference in boat speed between the different boats. It is mainly down to the driver and being able to operate the boat correctly and efficiently. All the systems on board must work properly, be smooth and able to cope when it starts blowing.
2. Jib halyard tension. Carry a marker pen on-board, so when you discover the magical go fast tension for the jib halyard, you can reproduce it the next time you go sailing. Also mark the boat, you can use graduated strip from a sail maker or just mark the mast with a pen. This marking is essential if you let the jib halyard off when going downwind. We never used to let the halyard off on the downwind legs as the chance of forgetting to tension it again at the end of the leg was too great. However these days every little helps to keep ahead of a competitive fleet, so it has to be done. We currently have a wire halyard with a loop and rope tail attached. The wire loop is held by a Wichard hook, then a 8:1 cascade tensioning system runs along the sole from the mast base to a cleat under the thwart. This gives full control of the halyard tension. Generally the halyard tension should be such that the leeward shroud does not go slack when hard on the wind.
You can adjust the jib on the luff wire by tensioning or releasing the line at the tack. We have light and heavy settings, though it is tricky sometimes adjusting when the sail is set on the end of the bowsprit. Better to do it before hoisting.
3. Kicker / vang. The number one control line on the boat. This gives you your pointing ability upwind. Mainsail leech tension makes the boat point. To start off, going upwind the main should be in no further than the end of the boom in line with mizzen shrouds. Now pull on the kicker, this pulls the boom down and outboard, so re-tension mainsheet until boom is in line with mizzen shrouds again. Keep doing this until you have your required leech tension. Kicker tension should be such that the top telltail on the mainsail leech is flying and stalling 50/50% of the time.
The kicker tension is critical in a boat without a mainsheet track. This technique is known as vang sheeting.
Kicker needs easing off at the top mark before bearing off downwind, it helps to keep the boat flat (or better still heeled to windward) as you bear away. On a reach kicker can be tightened but on a run well eased to allow mainsail to expose as much sail area as possible.
4. Outhaul. Needs to reflect wind conditions. Eased in the light, slowly tensioning as wind builds. Down wind, the outhaul should be fully eased, again have a marked position with a pen to ease it to once you bear away around mark, and don’t forget to tension again before going back upwind, again to a pre-marked position. The outhaul cleat is on the bottom of the boom, so it is the crews job to control it. Along with the kicker the outhaul controls leech tension, when eased it naturally tightens the leech, when pulled out along the boom, it tensions the foot and allows the leech to open, and therefore spill wind.
5. Cunningham. As the wind increases, the draft of the sail moves aft. Sail shape should be that the draft of the sail is kept in the forward 1/3 part of the sail. Initially this is set by the halyard, but once sailing the cunningham controls the draft. Generally tensioned upwind, eased off fully for reaching & downwind. Cunningham should be led aft to the helmsman so he can control it easily.
6. Mainsail shape. Depending on your mainsails built shape, try and keep the mainsail as flat as possible going upwind. Traditionally, for upwind, the flatter makes of mainsail suited the yawl better, the Westaway & Scanes sails being cut quite flat. The newer Ullman mainsail is cut fuller, therefore I now tend to sail with the mast chocks either removed or just one small one in. Once you get the kicker tensioned, this gives the mast pre-bend and draws the luff of the sail into its designed shape.
Downwind, once the kicker is eased, the mast straightens and the sail becomes fuller.
7. Mast rake. Mast tip to top of transom at centreline. 7450mm. This is before the rig is tensioned.
Aft face or mast heel, to front of centreboard case, 750mm.
To get the mast tip to transom dimension, attach the end of your surveyors cloth tape measure to the main halyard and hoist to masthead. Best done on a calm day, as the tape can blow about a bit.
These settings will give you your mast rake.
8. Spreaders, generally maximum rake, shortest length. Longer spreaders with less rake stiffen the rig.
9. Mizzen. Helps if sheet is led forward to side decks by thwart, mainly so you don’t have to turn around and face aft at the critical moment when running down to bottom mark to sheet it back in.
Sail should be able to be tensioned flat when going upwind, a flogging mizzen upwind is not quick.
Maximum rake to mizzen mast, gives separation between main and mizzen (remember Steinlager II !!)
10. Slot gasket. Needs to be fitted, in good condition with two halves overlapping so they close behind centreplate when fully down. Should have slight ‘V’ cut in aftermost end to maximise the venturi effect and drain water from centreplate case when moving forward.
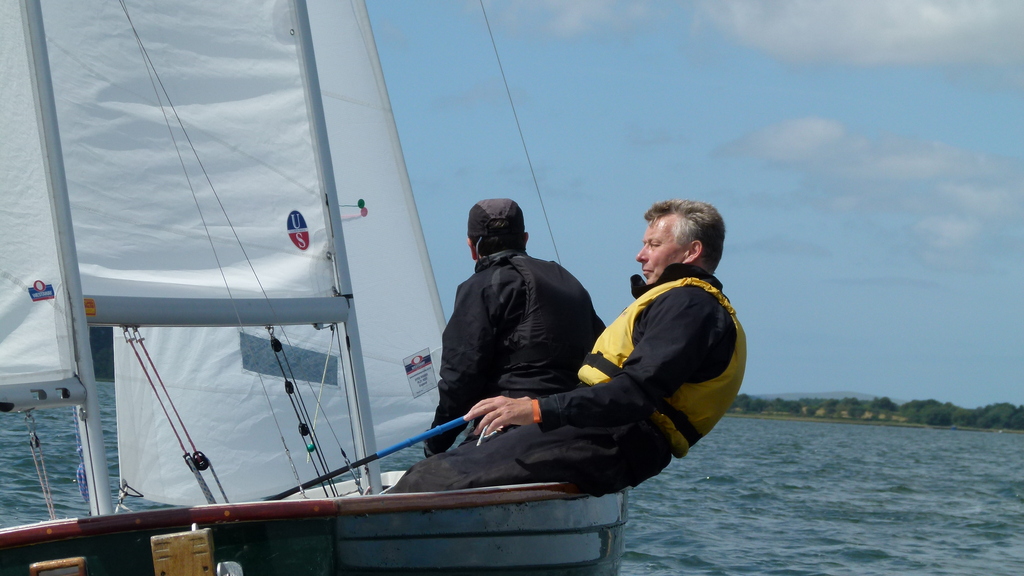
11. Keep your weight forward in all conditions apart from heavy airs reaching or downwind. Helm should never be further aft than the main thwart. If you look at the profile shape of the boat, the centre of buoyancy is well forward, between centreplate and mast. This is where your weight should be concentrated. In light airs both helm and crew should be forward of the thwart.
12. Jib pole. Make a 3mm rope ring to the clew of the jib. You can then attach jib pole to this, so when jibing you don’t need to disconnect pole from jib sheet.
13. Centreplate. Mark positions for upwind, reaching & running with a marker pen. Upwind the shackle hole should be approx. 50mm above the centreplate case. This gives a vertical leading edge to the centre plate. If you allow the shackle pin right down to the casing top the tip of the centreplate will be pushed forward. OK for light airs, but makes the plate grippy for windier stuff.
Reaching is halfway up, again marked with pen. Downwind, either fully retracted in the lighter stuff, or in windier conditions, you may want more directional stability, so with just the tip in centreplate box, again this position needs to be marked to achieve easily.
Crew should operate the centreplate, as this is a job to do when approaching a mark rounding or leaving one, it gives the helm full concentration to make a good rounding and fend off any attackers at the mark.
It is a good idea to fit a length of 8mm bungee to the plate, it is run forward under the deck to the stem and back. When the plate is fully lowered this is now tensioned, so if you touch the bottom the plate lifts easily, allowing boat to not come to a complete stop. (this is a Topsham SC trick.)
Plate should be epoxied to as near an aerofoil shape as possible given the restricting shape of the centreplate box. Rounded to the leading edge and forward 1/3. Thin as possible and squared off to the trailing edge.
14. The yawl always seems to like a bit of heel to leeward, particularly in light airs to give the helm some feel. As the breeze increases hike to keep the boat flat. In the gusts, hike to flatten the boat just before the gust hits. Ease the main slightly as the gust hits then sheet back in when you hike. This gets the boat moving forward, increasing flow over the sails and foils. The opposite of getting hit by a gust, heeling over and going sideways. Hiking hard and working the main makes quite a difference going upwind. You can see the gains when sailing alongside a boat that heels too much in the gusts.
15. Startline. Be at maximum speed, on the startline, at the gun. You need at least a good countdown watch, I get the crew to count down the last 10 seconds to me. You can then concentrate on sailing the boat rather than looking at your watch.
Being at the right end of the line, at speed, on the gun and you’ve cracked it. The skill is achieving this. There are endless books on the subject of getting a good start, all well worth reading. Then the critical part, practice what you have read. There is no point starting in the second row and expecting to catch the leaders. Trying to catch up after a bad start is very difficult once the leader is in clear air and has a choice of course to sail. Once you are amongst the fleet on the second row, the boats around you dictate your course, strategy etc. Better to be out in front at the start with clear air.
I have not tried a startline GPS, that gives you a reading of time and distance to the line, from reports I have heard, the GPS is not quick enough to adapt to the moving boat, bow up, bow down, to be of much use. But am willing to be proved wrong.
To determine the biased, windward end of the line. Sail along the line with the mainsail sheeted in a position to just stop the luff lifting. At the end of the line, gybe around and sail a reciprocal course along the line without touching the mainsheet. If the sail is now flapping or the luff lifting, then the end of the line you are sailing to now is the biased windward end. If you have to ease the main to make the luff lift, then the end behind you is the biased windward end.
I was having trouble with starting this year, constantly getting it wrong, starting on the 2nd row and having to work my way though the fleet. Talking to a sailing friend about this he suggested re-reading ‘Winning in One Designs’ by Dave Perry. So I read through the relevant chapters on starting, and put it all into practice on the next Wednesday night race. Made a difference, we went on to win the start and the race. So never too late to read another book on sailing & tactics.
16. Upwind. Its all about separation and leverage. This is why the fleet gets so spread-out on the upwind leg. If the wind shifts left, the boats on the left hand side gain, and when the wind shifts right again the right hand boats gain. The bigger the distance between left hand and right hand boats the bigger the gains and losses. This is why boats on a flyer to one side of the course make massive gains or losses. If you are unsure which way to go, it is better to sail with the pack and observe the other boats gains and losses, if you see a side paying off, then get over there as soon as you can, even taking a loss to get there. It is better to be late to the right side of the course than never getting there. This is a good one to read about, upwind strategy suddenly becomes clearer after you have worked it out.
Going off on flyers to one side of the course rarely pay off in the long run, you may gain once, but the next time you will lose out.
17. Downwind. Ease everything. Kicker, outhaul eased to pre-marked position, cunningham off, plate up to pre-determined marks. It is a good idea to mark the plate handle where it has the tip just inside the slot. This closes the slot completely without having to pull plate right up into the boat. (though this is very effective.)
Also you should have a reaching mark for the plate, again marked on the handle. So when you get to the windward mark and bear away, all the settings are easy to duplicate.
When sailing downwind you need to keep clear air. You need to bear away in the gusts and head up in the lulls to keep your boat speed. Doing this make a huge difference to reaching and downwind speed. If alongside another boat, you can watch the gap widen if you are getting it right.
To see these gusts and lulls coming you need to be spotting where the wind is coming from, over your shoulder. This is a good job for the crew.
18. Remember to try to sail the shortest distance to the mark, on all legs.
19. The opposite of this is to always make sure you have clear air, upwind and downwind. Re-position the boat on the course as soon as possible if you don’t have it.
20. Use white antifouling, you can then tell when you have slime or weed on it. Same goes for the centreplate and rudder blade.
21. Hull bottom preparation. Last year, and the beginning of this year the new production yawl was looking to be unbeatable. The main difference, (apart from a superb helm) was that the boat had never been antifouled and was dry sailed. For this year the boat was antifouled and kept on a mooring for the season. This has made quite a difference, in that other boats now have a chance of keeping up. What this proves, and that we all know, is that the smoothness, and cleanliness of the bottom of the hull has a huge difference on performance. The proof has now been seen.
Flatting back the hard racing antifouling with 600 grit wet and dry is the way to go.
That’s about all I can think of at the moment.
Other than ‘Winning in One Designs’ by Dave Perry and the ‘North U Racing Tactics’ by Bill Gladstone, one of the best books on sailing that I have read is called ‘Race Winning Strategies, Smart Lessons with Deep Dakron’ by Tom Linskey. ISBN 0-924486-88-0
An American book that is quite a funny read. It is written in the narrative rather than a do this do that type sailing book. Read it, then apply what you have read, it really does work.
Tim Petitt